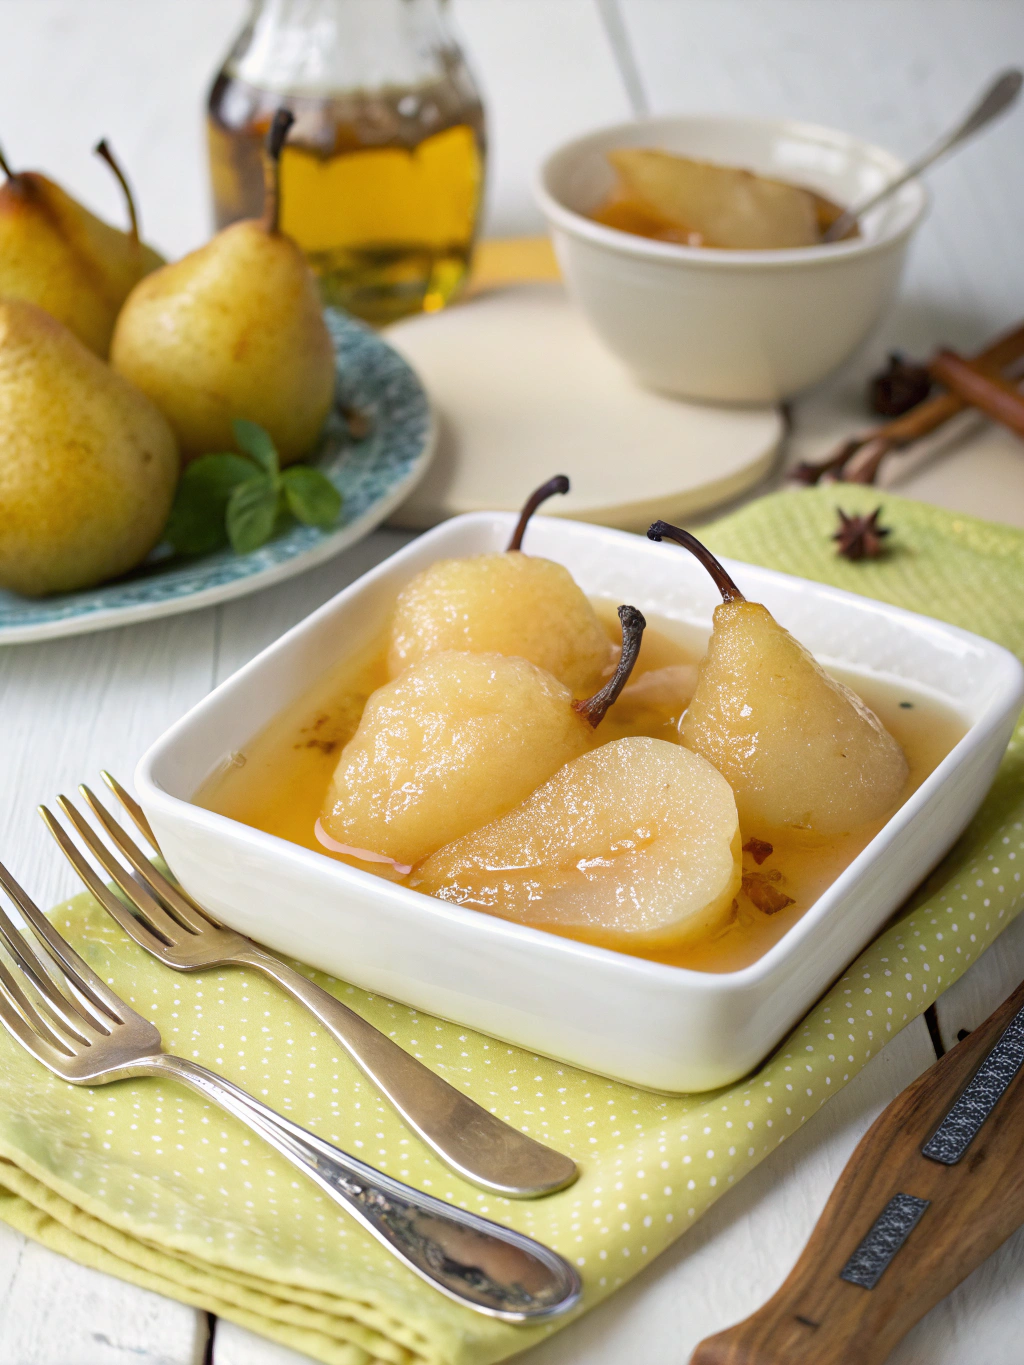
Sunshine in a Jar: The Unforgivably Delicious Canned Pears in Light Syrup Recipe
Ever wonder how some folks just casually whip out jars of home-preserved goodies when winter hits like they’re some kind of food magician? I’ve spent half my life trying to figure out—between burns, sticky countertops, and at least three permanent syrup stains on my ceiling (don’t ask)—how to capture summer’s bounty without turning my kitchen into what my neighbor Doris calls a “preservationist’s nightmare.” Let me tell you about canned pears in light syrup, which I’ve been perfecting since that disastrous summer of ’09 when I tried to preserve literally everything that didn’t move in my garden. These pears are what I call “sunrise jars”—they catch light like little golden treasures and make even the dreariest February morning feel like there’s hope. Trust me, once you’ve mastered the splooch technique (more on that later), you’ll never look at store-bought canned fruit the same way again. Honestly, just grab some pears and let’s do this thing.
My Pear-Preserving Journey (Or How I Learned to Stop Worrying and Love the Water Bath)
Let me start by saying I once thought canning was something only grandmothers with too much time did. Then Mark (my ex who had surprisingly good taste in fruit trees) planted two pear trees in 2013—no, wait, it must’ve been 2011 because that was before the Great Squirrel Incident of 2012. Anyway, those trees decided to produce approximately 9 million pears simultaneously last August, and I panicked.
My first attempt at canned pears in light syrup resembled cloudy fish tanks—all floating bits and questionable murkiness. Aunt Jennine (who isn’t actually my aunt but lived next door when I was 5) watched me struggle for about 20 minutes before intervening. “You’re jar-traumatizing those pears,” she said, grabbing my tongs and demonstrating what she called the “gentle persuasion method.”
I’ve since developed my own approach, which I perfected in Montana (where the altitude makes everything more complicated) and later simplified in my tiny apartment in Cincinnati (where counter space is measured in precious square inches). The recipe has evolved from cloyingly sweet to what I now call “honest sweetness”—just enough syrup to preserve but not enough to mask the pear’s dignity.
What makes canned pears in light syrup so addictive is the way they maintain their identity through the preservation process (unlike some fruits that basically surrender their entire personality to sugar—I’m looking at you, canned peaches).
Ingredients List for Sunshine Jars
- 5 pounds of nearly-ripe pears (Bartlett or Anjou are my go-to, but Bosc work if you’re feeling fancy) – The slightly underripe ones hold their shape better, but if all you’ve got are soft pears, use ’em anyway and call the result “rustic”
- 2 cups granulated sugar – the cheap stuff works just fine; save your organic demerara for impressing dinner guests
- 7-ish cups water – filtered if you’re persnickety, tap if you’re like me
- 1/3 cup lemon juice (fresh-squeezed ideally, but the bottled stuff in a pinch)—this prevents the dreaded browning misery
- 2 squeezeworths of honey (optional, but adds what I call “background warmth”)
- 1 vanilla bean, split lengthwise (or 1½ tsps vanilla extract if you’re not trying to be fancy)
- A whisper of cinnamon (maybe ¼ tsp if you insist on measuring)
- 3 whole cloves (or don’t, especially if you’ve had a clove-related trauma)
- A thumb-sized piece of ginger, peeled and thwackered (my term for roughly smashed)
- ½ tsp salt (preferably sea salt, but whatever’s in your salt cellar will do)
Getting Down to Pear Business: Directions
A) Prepare Your Battlefield
First things first—clear every non-essential item from your counters. I once lost a measuring cup for three days during canning season (it was behind the toaster, obviously). Fill your largest pot with water and set it to boil. Meanwhile, wash your canning jars in soapy water—I don’t care what your dishwasher claims, do this by hand. Place them upside down on a clean kitchen towel. Boil the lids and rings for 1 minute, then let them hang out in the hot water. Check out our guide on sterilizing equipment for more details.
¹¹) The Syrup Situation
In a medium saucepan (or what my grandfather would call “the not-quite-big-pot”), combine water and sugar. Heat gently—not a rolling boil, more like an enthusiastic simmer—until sugar dissolves. Add your vanilla, cinnamon, cloves, and thwackered ginger. Let this bubble away for about 7 minutes, or until it smells like heaven decided to visit your kitchen. Remove from heat and fish out the ginger chunks and cloves if you can find them. Sometimes they hide; it’s fine.
C) Pear Preparation (The Messy Part)
Fill a large bowl with cold water and add half the lemon juice. This is your pear holding tank. Now, peel your pears—I use a regular vegetable peeler because those fancy Y-peelers always betray me. Cut them in half and use a melon baller (or teaspoon if you’re normal and don’t own specialized fruit-scooping equipment) to remove the core and that weird stringy bit that nobody talks about but everyone hates. Slice each half into thirds—actually, wait—quarters if they’re large pears. Some people like halves but I think they’re unwieldy in the jar and make for awkward eating later.
As you finish each pear, perform the “splooch”—this is where you gently drop each piece into the lemon water with just enough force to create a tiny splash but not enough to cause kitchen flooding. This prevents browning through what I assume is fruit baptism.
VII) Jarring Operation
Working quickly-ish (no need to panic, but don’t stop to check Instagram either), remove your jars from their towel. Using a funnel—or a steady hand if you’re showing off—pack the pear pieces into jars. Don’t mash them down like you’re angry at them, but do fill the jars properly. I like to do a sort of gentle shimmy-shake to help them settle. Leave about an inch of space at the top (what the canning overlords call “headspace”).
Now for the moment of truth: pour your warm (not scalding!) syrup over the pears, covering them completely but still maintaining that headspace. I know it’s tempting to fill it to the absolute brim, but resist! That space is critical for physics reasons I only partially understand but fully respect. Run a butter knife (or official canning tool if you’re fancy) around the inside edge to release air bubbles. Add more syrup if needed after the bubbles escape. Our friends at Ball have excellent visual guides for this step.
E) The Sealing Deal
Wipe the jar rims with a clean, damp cloth—sticky rims are the enemy of proper sealing. Apply lids and screw bands until “fingertip tight”—which means just until you feel resistance, not The Incredible Hulk tight.
Lower jars into your boiling water bath using jar tongs (please don’t use regular tongs—I learned this lesson through pain and failed seals). Make sure water covers jars by at least 1 inch. Process pint jars for 20 minutes, quart jars for 25—add 5 minutes if you live somewhere high altitude because air is thinner and physics hates your canning efforts at elevation.
After processing, remove jars and place them on a towel-covered surface where they can remain undisturbed for 12-24 hours. You’ll hear the satisfying “ping!” as they seal—each one is a tiny victory.
Nuggets of Pear Wisdom (Tips & Cautions)
• DO NOT reuse old canning lids. I don’t care how thrifty your grandmother was—new lids every time. This isn’t negotiable unless you enjoy botulism.
• The “fingertip tight” concept took me three seasons to master. Too tight and the air can’t escape during processing; too loose and water seeps in. Think “firm handshake with someone you respect but don’t know well” tightness.
★ Wait at least two weeks before opening your first jar—this allows the flavors to mellow and the pears to achieve what I call their “syrup equilibrium.”
• For gift-giving, add a stick of cinnamon to each jar before sealing. People will think you’re fancy, even if you canned these while wearing pajamas and watching reality TV (which I absolutely never do).
• If your pears float to the top in the finished jar, don’t panic! This is normal and what I call “pear buoyancy syndrome.” The fruit will sometimes settle over time, but even if it doesn’t, it’s perfectly fine.
⚠️ That one time I tried to rush the cooling process by putting hot jars in the freezer resulted in a catastrophic crack-splosion. Don’t do this. Patience is a virtue in canning as in life.
Equipment I Swear By
BUCKET & HARLEY’S JAR LIFTER ★★★★★
The rubberized grip has saved me from at least 17 potential jar disasters
Mine has survived 8 years of abuse and still works despite that time I accidentally left it on a hot burner
WIDE-MOUTH FUNNEL FROM THE 1990s ★★★★★
Inherited from my mother’s canning phase; they don’t make plastic this indestructible anymore
Has a mysterious stain that appeared in 2014 but doesn’t affect functionality whatsoever
VICTORINOX Y-PEELER ★★★★★
Amazon: https://www.amazon.com/dp/B0000CEWJD
Contrary to the manufacturer’s suggestion to replace annually, I’ve used mine for 6 years
Can also be used as an emergency screwdriver when you can’t find your actual screwdriver
Mix It Up: Variations & Substitutions
Boozy Sunshine Jars: Add 1 tablespoon of bourbon to each jar before sealing. The alcohol evaporates during processing, leaving behind a caramel-whisper that makes these canned pears in light syrup dangerously addictive at breakfast.
Lavender Dream: Replace the vanilla with 1 tablespoon of culinary lavender tied in cheesecloth. Sounds like something that would be disgusting but is actually transcendent, especially when served with vanilla ice cream in July when you’ve forgotten it’s from last year’s harvest.
If pears aren’t available, you can substitute firm apples, though they’ll need a slightly longer processing time and you’ll need to call them “apple preserves” instead of canned pears in light syrup (obviously).
For a less sweet version that my cousin Brian swears cured his sugar cravings (doubtful), reduce sugar to 1 cup and add an extra squeeze of lemon.
The One Question Everyone Asks
Q: Why did my pears turn brown even though I followed all the directions?
A: Despite what every other canning expert says, occasional browning happens to the best of us and isn’t necessarily a sign of failure. I once had an entire batch turn the color of weak tea, but they tasted amazing. The most likely culprit is oxygen exposure before processing—I’ve found that working faster during the cutting phase rather than meticulously perfect cuts makes a bigger difference. Also, what I call the “lemon bath commitment level” matters—if your lemon water seems weak, double the amount next time. But truthfully, slightly browned canned pears in light syrup still make excellent midnight snacks and phenomenal pear crisps.
Final Thoughts on Jarred Sunshine
There’s something magical about opening a jar of home-canned pears in light syrup in the dead of winter—like finding a time capsule from a warmer, sweeter time. I’ve come to believe that preserving food is less about perfect technique and more about capturing a moment—the sunny afternoon when the pears were perfectly ripe, the kitchen windows open, maybe that one song playing on the radio.
Will your canned pears be perfect? Maybe not. Will they be better than anything you can buy in a store? Absolutely. What questions remain about the process? How much headspace is truly ideal? Will we ever agree on the perfect ripeness?
I’m already planning next year’s batch with a spiced honey variation that might change everything I know about canned pears. Maybe I’ll even invest in one of those fancy automatic jar sealers (who am I kidding—I’ll be using the same water bath canner until it disintegrates).
Remember: canned pears in light syrup aren’t just preserved fruit—they’re portable optimism in glass containers.
Happy canning,
Chef ElizaBee, Two-Time Runner-Up in the Unofficial Neighborhood Preserves Contest (categories contested by Doris, still bitter about 2018)
Related Recipes