
Ever crave a rich, creamy dessert but dread the long ingredient list and prep time? You’re not alone. Many of us want something indulgent yet simple to make. That’s where this 3-ingredient recipe comes in. Perfect for those on a keto diet or anyone who loves a quick, delicious treat, our recipe for Keto Chocolate Mousse transforms minimal ingredients into maximum flavor. Enjoy a velvety, chocolatey delight that satisfies your sweet tooth without any fuss.
This dessert skips the cream cheese but still delivers a velvety texture you’ll love. With just three high-quality ingredients, you can whip it up in 10 minutes. It’s a game-changer for busy weeknights or last-minute gatherings.
Not only is it easy to make, but it’s also packed with nutritional benefits. Each serving is low in carbs and high in flavor, making it a guilt-free indulgence. Plus, it’s versatile—store it in the fridge for up to two weeks or freeze it for later.
Ready to dive in? Let’s explore how to create this decadent dessert and why it’s a must-try for keto enthusiasts and dessert lovers alike.
Key Takeaways
- Only 3 ingredients needed—no cream cheese required.
- Prep time is just 10 minutes, perfect for busy schedules.
- Rich, creamy texture with a low-carb, keto-friendly profile.
- Can be stored in the fridge or freezer for later enjoyment.
- Ideal for keto dieters and dessert enthusiasts alike.
Overview of This Delicious Keto Dessert
Looking for a dessert that’s both indulgent and simple to prepare? This 3-ingredient recipe is here to save the day. It’s rich, creamy, and perfectly fits a keto lifestyle. With minimal effort, you can enjoy a treat that feels decadent without the guilt.
What Makes This Recipe Unique
What sets this dessert apart is its authentic texture and clever use of ingredients. Unlike other recipes that rely on whipped cream and cocoa, this one delivers a true mousse experience. The combination of sugar-free chocolate and heavy cream creates a perfect balance of flavor and richness.
One standout feature is the use of a blender. This ensures a consistent, silky mix that’s hard to achieve with manual methods. The recipe also avoids common pitfalls, like a gritty texture, by using high-quality ingredients and precise techniques.
Later sections will dive deeper into the roles of each ingredient and the science behind achieving that perfect mousse texture. For now, know that this recipe is a game-changer for anyone who loves a quick, delicious, and keto-friendly treat.
Essential Ingredients for a Perfect Keto Chocolate Mousse
Crafting a perfect dessert starts with the right ingredients. Each component plays a crucial role in achieving the ideal flavor and texture. For this recipe, three key elements come together to create a rich, velvety treat that’s both indulgent and low-carb.
High-Quality Sugar-Free Chocolate
The foundation of this dessert is premium sugar-free chocolate. It provides the deep, rich flavor that defines the dish. Using high-quality options ensures a smooth texture and avoids any grittiness. Look for unsweetened or sugar-free varieties with minimal carbs for the best results.
Heavy Cream and Its Dual Role
Heavy cream is a versatile ingredient that serves two purposes. When whipped, it adds airiness and lightness to the dessert. When warmed, it helps emulsify the mixture, creating a silky consistency. Opt for high-fat cream to achieve the perfect balance of richness and structure.
Vanilla extract is the final touch that elevates the flavor profile. A small amount adds depth and balances the intense chocolate notes. Always use pure vanilla for the best results, as it enhances the overall taste without overpowering the dish.
If you need substitutions, consider alternatives like coconut cream for heavy cream or monk fruit sweetener for sugar-free options. These swaps maintain the dessert’s integrity while catering to dietary preferences. For more ideas, check out this 3-ingredient recipe.
Step-by-Step Preparation Guide for Your Mousse
Ready to whip up a creamy dessert in minutes? Let’s get started! This guide walks you through each step to ensure your dessert turns out smooth, rich, and perfectly balanced. Follow these instructions for a treat that’s as easy to make as it is delicious.
Prepping Your Ingredients
Begin by gathering all your ingredients. Measure 1 cup of heavy cream and set it aside. Next, prepare your sweetener—whether it’s powdered erythritol or monk fruit, ensure it’s finely ground to avoid grittiness. Finally, chop your sugar-free chocolate into small pieces for easier melting.
Pro tip: Use a kitchen scale for precise measurements. This ensures the right balance of flavors and maintains the low-carb profile of your dessert.
Mixing Techniques and Timing
Start by whipping the heavy cream until it forms stiff peaks. This usually takes about 3-4 minutes with an electric mixer. Be careful not to overmix, as it can lead to a grainy texture.
Next, melt the chocolate gently using a double boiler or microwave. Once melted, let it cool slightly before folding it into the whipped cream. Add your sweetener and a splash of vanilla extract for extra flavor.
For the best results, blend the mixture in short pulses. This ensures even distribution without overmixing. Transfer the mousse into individual serving dishes and chill for at least 1 hour to set.
By following these steps, you’ll create a dessert that’s both indulgent and easy to make keto-friendly. Enjoy the rich, velvety texture in every bite!
Blender Techniques for Achieving a Silky Texture
The secret to a smooth, velvety dessert lies in your blending technique. Using a blender simplifies the process, ensuring every ingredient is perfectly combined. This step is crucial for creating that iconic silky texture you crave.
Tips for Proper Blending
Start by blending your ingredients at a medium speed. This ensures even mixing without overworking the mixture. Gradually increase the speed to achieve a smooth consistency. For best results, use a high-quality blender that can handle thick mixtures.
When incorporating cocoa, ensure it’s finely ground to avoid lumps. Add it slowly while blending to distribute it evenly. This step is key to achieving a rich, consistent flavor throughout your dessert.
Preserve the light, airy quality of your whipped cream by folding it in gently after blending. Overmixing can deflate the cream, resulting in a denser texture. Use a spatula for this step to maintain the fluffiness.
If you’re using a mixer for whipping cream, switch to a blender for the final mixing stage. This combination ensures a smooth, velvety texture while preserving the cream’s lightness.
Troubleshooting Common Blending Issues
If your mixture is too thick, add a splash of warm water or cream. Blend in short pulses to avoid overmixing. For a grainy texture, check the quality of your cocoa and ensure it’s finely ground before blending.
Always scrape down the sides of the blender to incorporate all ingredients evenly. This prevents lumps and ensures a consistent texture throughout your dessert.
| Blending Tip | Benefit |
|---|---|
| Blend at medium speed | Ensures even mixing without overworking |
| Add cocoa slowly | Prevents lumps and ensures even distribution |
| Fold whipped cream gently | Preserves lightness and airy texture |
| Scrape blender sides | Avoids lumps and ensures consistency |
By following these techniques, you’ll achieve a dessert with a flawless, silky texture every time. Whether you’re a beginner or a pro, these tips will elevate your blending game.
Understanding the Science Behind the Mousse Texture
The magic of a perfect dessert lies in its texture and balance. Achieving that smooth, velvety consistency involves understanding the science behind the ingredients and techniques. Let’s break down the key factors that contribute to the ideal mousse texture.
The Role of Eggs and Emulsification
Eggs play a crucial role in creating the perfect dessert. They act as emulsifiers, binding the fats in heavy cream with other ingredients. This process ensures a smooth, consistent mixture without separation.
When you whisk eggs, their proteins unfold and trap air. This creates a light, airy structure that enhances the dessert’s fluffiness. Adding eggs to the mixture also stabilizes it, preventing it from collapsing during refrigeration.
Temperature is another critical factor. Cold eggs blend better with heavy cream, ensuring a stable emulsion. Always use pasteurized eggs for safety and optimal results.
Blending Heavy Cream for Stiff Peaks
Whipping heavy cream to stiff peaks is essential for the dessert’s texture. The process incorporates air, making the cream light and fluffy. Use a chilled bowl and whisk for best results.
Overwhipping can cause the cream to separate, so monitor the time carefully. Aim for a smooth, glossy finish with firm peaks that hold their shape.
Timing and Temperature
Proper time and temperature management are key to success. Chill your mixture for at least 1 hour to set the texture. This allows the ingredients to meld and stabilize, ensuring a velvety finish.
If you’re short on time, you can speed up the process by placing the dessert in the freezer for 30 minutes. Just avoid over-freezing, as it can alter the texture.
| Technique | Benefit |
|---|---|
| Whisk eggs thoroughly | Creates a light, airy structure |
| Whip heavy cream to stiff peaks | Adds fluffiness and stability |
| Chill mixture for 1 hour | Ensures a smooth, velvety texture |
| Use pasteurized eggs | Ensures safety and optimal emulsification |
By understanding these scientific principles, you can master the art of creating a dessert with the perfect texture. Whether you’re a beginner or a pro, these insights will elevate your dessert game.
Flavor Variations and Enhancement Ideas
Want to add a unique twist to your dessert game? Let’s explore some creative flavor ideas. With just a few simple additions, you can transform your dessert into something extraordinary. Whether you’re craving a refreshing minty kick or a zesty citrus burst, these variations will elevate your treat without compromising its smooth texture.
Creative Twists: Mint, Orange, and More
Adding flavors like peppermint extract or orange zest can bring a whole new dimension to your dessert. For a refreshing twist, try a few drops of peppermint extract. It pairs perfectly with the rich base, creating a cool, minty finish. If you prefer a citrusy note, fold in some finely grated orange zest. This adds a bright, tangy flavor that balances the richness.
For those who enjoy a hint of spice, a pinch of cayenne pepper can add a surprising kick. The warmth of the spice complements the sweetness, creating a complex flavor profile. These additions are easy to incorporate and won’t disrupt the light airy consistency you’ve worked hard to achieve.
When adding these flavors, it’s important to follow a careful step-by-step process. Start by mixing the flavoring agent into a small portion of the base. This ensures even distribution without overmixing. Use a gentle folding motion to incorporate the mixture back into the main bowl. This technique preserves the dessert’s delicate structure.
Here are some tips to keep in mind:
- Use high-quality extracts or fresh zest for the best flavor.
- Add spices sparingly to avoid overpowering the dish.
- Always taste as you go to ensure the right balance.
By experimenting with these flavor ideas, you can create a dessert that’s uniquely yours. Whether you stick to classic combinations or try something bold, the possibilities are endless. Enjoy the process and savor the results!
Nutritional Information and Serving Suggestions
Curious about the nutritional benefits of your favorite dessert? This treat is not only delicious but also fits perfectly into a low carb lifestyle. Each serving contains approximately 194 calories, making it a guilt-free indulgence. With only 2 grams of fat and 32 grams of carbohydrates, it’s a balanced option for those watching their macros.
Here’s a detailed breakdown of the nutritional profile per serving:
| Nutrient | Amount |
|---|---|
| Calories | 194 kcal |
| Total Fat | 2g |
| Carbohydrates | 32g |
| Protein | 15g |
| Sugar | 29g |
This dessert is an ideal post-meal treat for those following a low carb or keto diet. Its macronutrient profile ensures you can enjoy it without derailing your dietary goals. The high protein content also helps keep you satisfied longer.
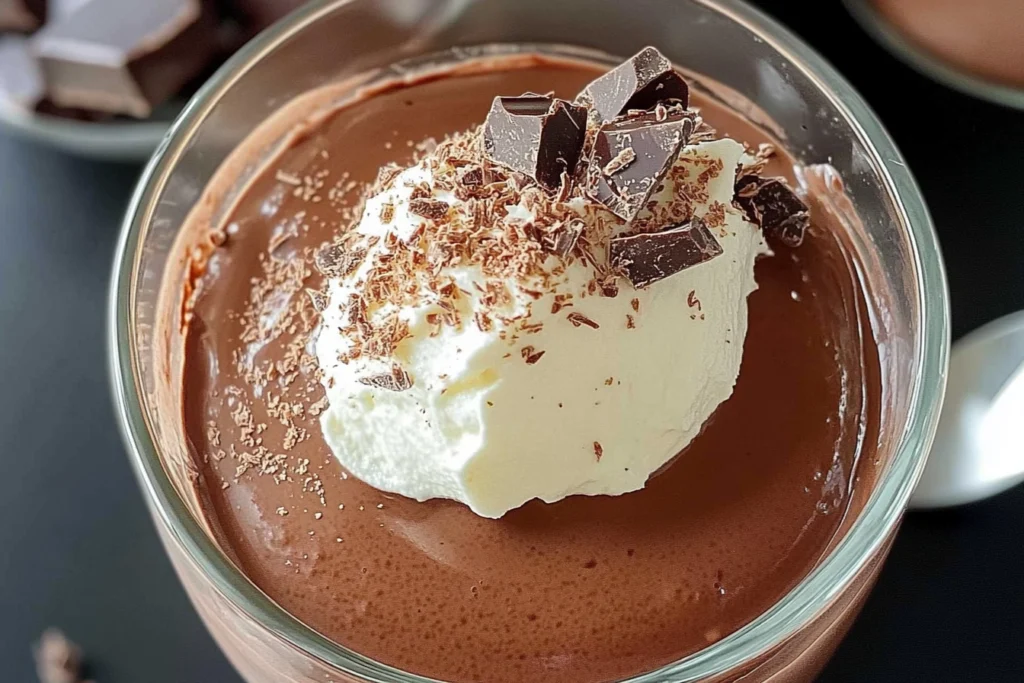
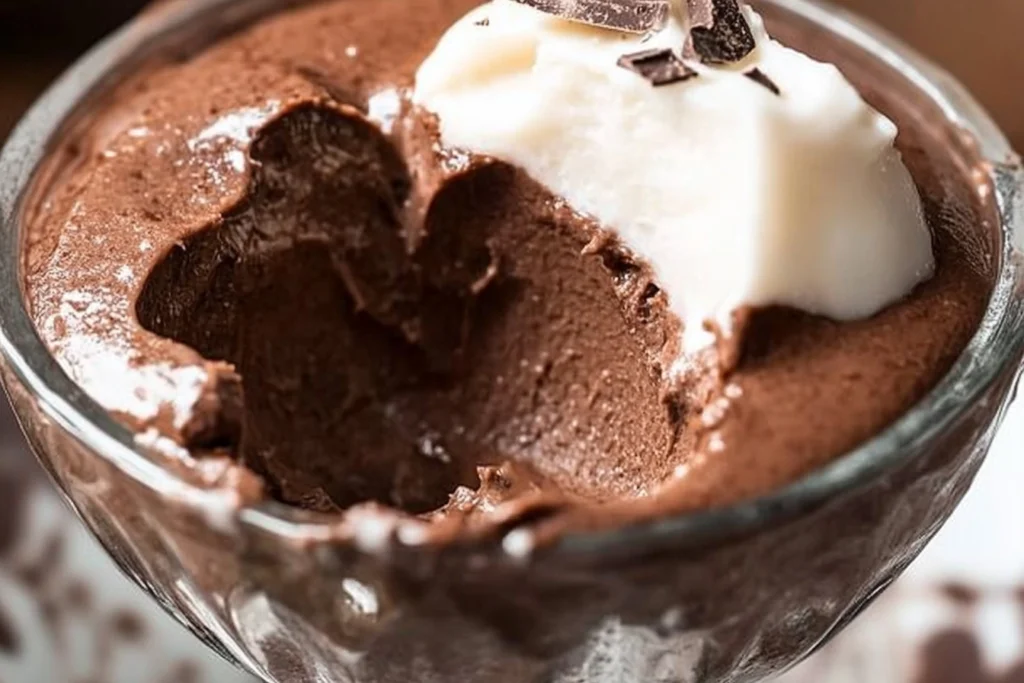
For serving, portion it into small bowls or ramekins. Add toppings like whipped cream, fresh berries, or a sprinkle of powdered sweetener for extra flavor. If you’re feeling adventurous, try a version with crushed nuts or a drizzle of sugar-free syrup.
Store leftovers in an airtight container in the fridge for up to 4 days. For a fluffier texture, serve immediately after blending. Alternatively, refrigerate for 20-30 minutes for a pudding-like consistency. These tips ensure your dessert stays fresh and delicious every time.
Keto Chocolate Mousse: Tips and Tricks for Success
Mastering a creamy dessert doesn’t have to be complicated. With the right techniques, you can avoid common mistakes and achieve the perfect texture every time. Whether you’re a beginner or a seasoned cook, these tips will help you create a dessert that’s smooth, airy, and delicious.
Avoiding Common Pitfalls
One of the biggest challenges is overmixing. This can lead to a dense, grainy texture. To prevent this, blend your ingredients in short pulses. Always scrape down the sides of the bowl to ensure even mixing.
Temperature is another key factor. Cold ingredients blend better and help maintain the dessert’s structure. Chill your bowl and tools for at least an hour before starting. This ensures your mixture stays light and airy.
Using the right tools also makes a difference. A hand mixer is ideal for whipping cream to stiff peaks. Avoid overwhipping, as it can cause the mixture to separate. Monitor the process closely for the best results.
Secrets to Achieving Stiff Peaks
Stiff peaks are essential for a fluffy texture. Start by whipping your cream at medium speed. Gradually increase the speed as the cream thickens. Add a pinch of salt to stabilize the mixture and enhance the flavor.
For the best results, use a chilled bowl and whisk. This helps the cream whip faster and hold its shape. If your mixture starts to look grainy, stop immediately and fold in a splash of cold cream to smooth it out.
Timing is crucial. Whip the cream just until it forms stiff peaks. Overwhipping can lead to a buttery texture, which is harder to fix. Use a hand mixer for precise control and consistent results.
| Tip | Benefit |
|---|---|
| Chill your tools | Ensures a light, airy texture |
| Use a hand mixer | Provides precise control |
| Add a pinch of salt | Stabilizes the mixture |
| Monitor whipping time | Prevents overmixing |
Conclusion
Transform your dessert routine with this effortless recipe. With just three ingredients, you can create a sugar free treat that’s both indulgent and healthy. This chocolate mousse recipe is perfect for anyone looking to enjoy a low-carb dessert without sacrificing flavor.
Follow the detailed tips provided to ensure success every time. Whether you’re new to this recipe or a seasoned pro, the results will be smooth, creamy, and delicious. Don’t forget to print the recipe card for easy reference or share your creation on social media.
We’d love to hear how it turned out for you! Try it this month and explore the variations mentioned in the post. This recipe is a trusted, innovative option for every occasion. Enjoy the simplicity and taste of this sugar free delight!
FAQ
Can I make this dessert without heavy cream?
Yes, you can substitute heavy cream with coconut cream for a dairy-free version. Just ensure it’s chilled for the best results.
What type of sweetener works best for this recipe?
Erythritol or monk fruit sweeteners are ideal as they blend well and don’t leave an aftertaste. Always use powdered versions for a smooth texture.
How long does it take to prepare this dessert?
From start to finish, it takes about 15 minutes to prepare, plus an additional 1-2 hours to chill in the fridge.
Can I add flavors like mint or orange to this recipe?
Absolutely! Adding a few drops of mint or orange extract can give your dessert a refreshing twist. Just adjust the amount to suit your taste.
How do I achieve stiff peaks when whipping the cream?
Use chilled cream and a cold mixing bowl. Whip on medium speed until soft peaks form, then increase to high speed until stiff peaks appear.
Is this dessert suitable for a low-carb diet?
Yes, this recipe is designed to be low in carbs, making it a perfect treat for those following a low-carb or ketogenic lifestyle.
Can I use a blender instead of a hand mixer?
Yes, a blender can work, but be careful not to overmix. Use short pulses to achieve the desired light and airy texture.
How should I store leftovers?
Store any leftovers in an airtight container in the fridge. It will stay fresh for up to 3 days.
What’s the role of eggs in this recipe?
Eggs help create a smooth and creamy texture through emulsification. They also add richness to the dessert.
Can I make this recipe ahead of time?
Yes, this dessert is perfect for making ahead. Prepare it a day in advance and let it chill in the fridge until ready to serve.
Table of Contents
3-Ingredient Keto Chocolate Mousse – No Cream Cheese Needed!
- Total Time: 10 minutes
- Yield: 4 servings 1x
- Diet: Gluten Free
Description
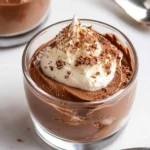
Indulge in this rich and creamy 3-Ingredient Keto Chocolate Mousse, made without cream cheese! Perfect for a quick and easy low-carb dessert, this mousse comes together in just 10 minutes with only three simple ingredients. It’s smooth, velvety, and packed with deep chocolate flavor, making it a must-try for keto dieters and chocolate lovers alike. No complicated steps—just whip, mix, and chill for a decadent treat!
Ingredients
- 1 cup (240ml) heavy cream (cold)
- 4 oz (113g) sugar-free chocolate (chopped)
- 1 tsp pure vanilla extract
(Optional: Powdered erythritol or monk fruit sweetener for extra sweetness, if desired.)
Instructions
Melt the Chocolate
- Use a microwave or double boiler to melt the sugar-free chocolate until smooth. Let it cool slightly but remain liquid.
Whip the Cream
- In a mixing bowl, whip the heavy cream using an electric hand mixer until soft peaks form. Add the vanilla extract and continue whipping until stiff peaks appear.
Combine & Blend
- Gently fold the melted chocolate into the whipped cream. Mix until fully combined and smooth. Avoid overmixing to keep the mousse light and airy.
Chill & Serve
- Transfer to serving dishes and refrigerate for at least 1 hour to set. Serve as-is or top with whipped cream, cocoa powder, or shaved chocolate for extra indulgence.
Notes
- Storage: Store in an airtight container in the fridge for up to 4 days or freeze for a longer shelf life.
- Dairy-Free Option: Swap heavy cream with full-fat coconut cream for a dairy-free version.
- Sweetness Level: If your chocolate isn’t sweet enough, add powdered erythritol or monk fruit sweetener to taste.
- Texture Tip: For an ultra-smooth mousse, use a blender or food processor instead of manually folding.
- Prep Time: 10 minutes
- Cook Time: 0 minutes
- Category: Dessert
- Method: No-Bake
- Cuisine: Keto, Low-Carb
Nutrition
- Serving Size: 1/4 of recipe
- Calories: 194 kcal
- Sugar: 2g
- Sodium: 20mg
- Fat: 18g
- Saturated Fat: 11g
- Unsaturated Fat: 7g
- Trans Fat: og
- Carbohydrates: 5g (Net Carbs: 3g)
- Fiber: 3g
- Protein: 3g
- Cholesterol: 45mg
Keywords: keto chocolate mousse, low-carb dessert, sugar-free mousse, easy keto dessert


